I was 30 years old when I found out I didn’t need CamScanner anymore.
For years, my document scanning routine looked like this: open the scanning app, scan the document, airdrop the file to my MacBook, rename it, and move it to the right folder in Google Drive. Every single time. For every single document. It felt normal because I’d been doing it that way for so long.
Turns out Google Drive has a built-in scanner. Google Drive’s built-in document scanner detects the edges of your document automatically, scans it, and saves it as a PDF directly to your Drive. No extra app. No airdrop. No detour through your desktop.
If you’ve been doing the same thing I was, this post is for you. Here’s how to scan documents to Google Drive in four steps.
Quick answer: Open the Google Drive app — tap "+" — select “Scan document” — hold your camera over the document — name the file — choose a folder — tap Upload. No extra app needed. Details below.
You only need one app
Before going through the steps: no, you do not need CamScanner, Adobe Scan, Microsoft Lens, or any other dedicated scanning app. The Google Drive app includes a built-in document scanner on both iOS and Android — the Google Drive scanner handles everything natively. If you have Google Drive on your phone, you already have everything you need.
How to scan documents to Google Drive: step by step
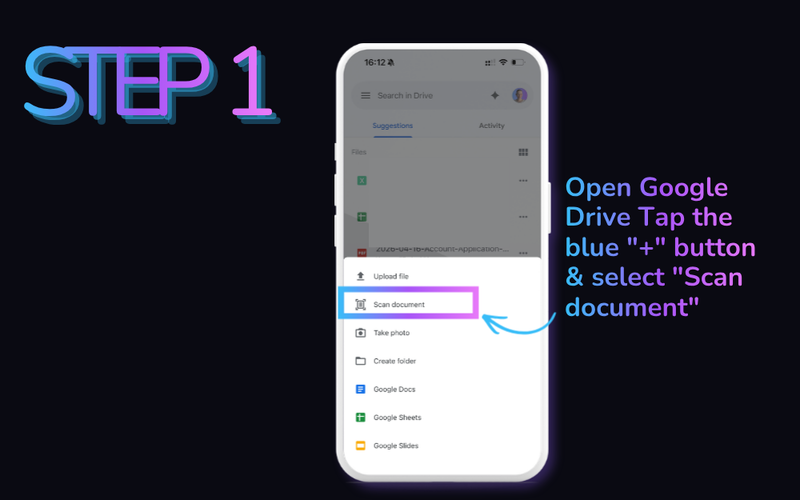
Step 1: Open Google Drive and tap the “+” button
Open the Google Drive app on your phone. In the bottom right corner, tap the blue "+" button to open the upload menu. Select “Scan document” from the list of options.
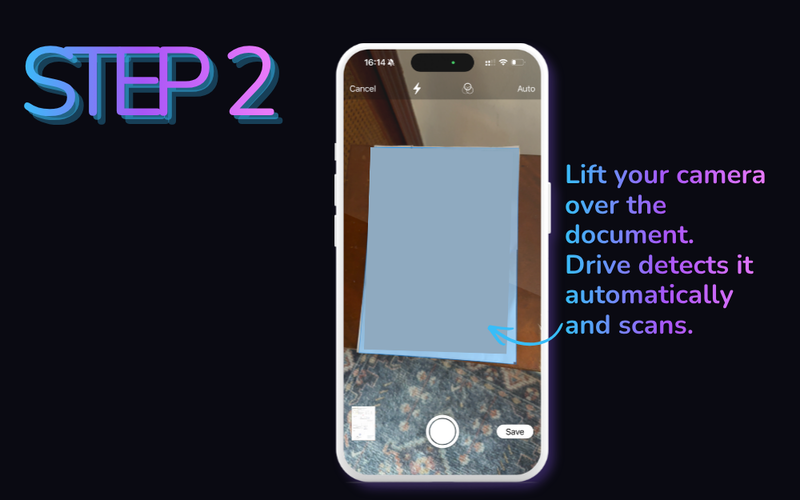
Step 2: Hold your camera over the document
Point your camera at the document you want to scan. Google Drive detects the edges of the document automatically and scans it without you needing to tap the shutter. If you want to scan multiple pages, you can keep adding pages before saving.
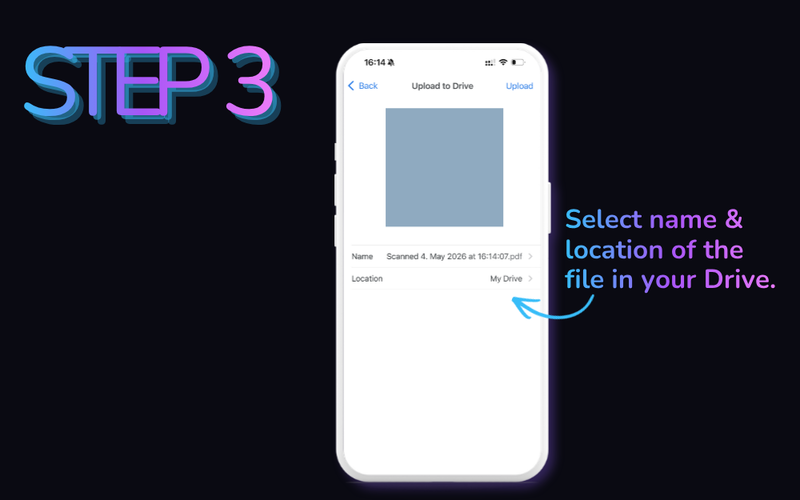
Step 3: Name the file and choose a location
After scanning, Google Drive prompts you to set a file name and choose where in your Drive to save it. By default, it will suggest a name like Scanned 4. May 2026 at 16:14:07.pdf. That name is not useful to anyone. Change it to something meaningful before you save, or read on for a faster way to handle this.
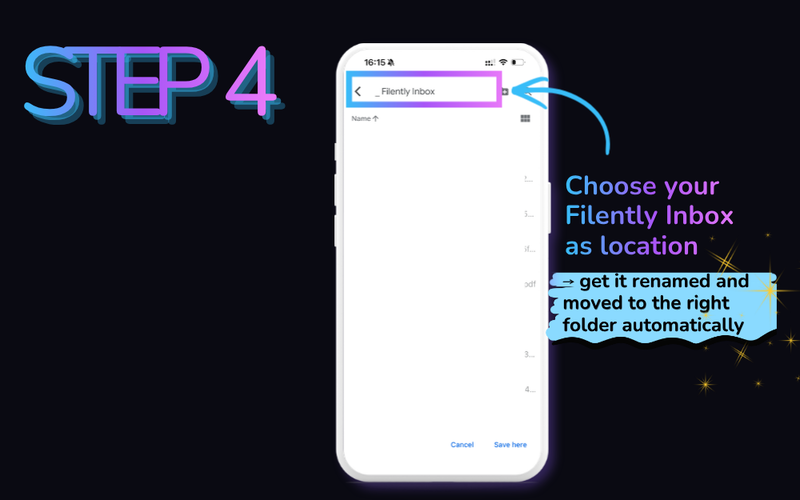
Step 4: Choose a location and save
Tap the location field to choose which folder in your Drive the scan should go into. Then tap Upload. The document lands in your Drive as a PDF, ready to use.
That’s the full process for how to save a scanned document to Google Drive. Four steps, no extra app, no airdrop, no laptop in the middle.
Already have a scanned file? Upload it directly
If you’ve already scanned a document elsewhere — or received one as a PDF — you can get it into Google Drive without scanning again.
On mobile: Open Google Drive, tap the "+" button, and select Upload instead of Scan. Find the file on your device and select it.
On desktop: Go to drive.google.com , click New → File upload, and select the file from your computer. Or drag it directly from your desktop into the Drive window. It lands in whichever folder you currently have open.
Either way: if you save to your Filently Inbox folder, the file gets named and filed automatically — same as any newly scanned document.
The one problem that remains (and how to fix it)
The scanning part is solved. The naming and filing part is not.
That default filename, Scanned 4. May 2026 at 16:14:07.pdf, tells you nothing about what the document is. If you rename it manually every time, you’re adding a step back in. If you skip it, your Drive slowly fills up with unsearchable scan files. Either way, the problem just shifted from the scanning app to the filing step.
That’s exactly why we built Filently . Save the scan into your Filently Inbox folder in Google Drive and Filently takes it from there: it reads the document, identifies what it is (invoice, contract, receipt, ID, whatever), applies your naming convention, and moves it to the right folder. You drop it in as-is. It comes out correctly named and filed on the other side.
Every scan lands with a garbage name. Filently fixes that. Drop scans into your Filently Inbox and they come out correctly named and filed. Automatically.
First 25 documents free. 2-minute setup. No credit card needed.

The full workflow:
- Open Google Drive, tap “+”, scan the document
- Save to your Filently Inbox folder
- Filently names and files it automatically
Scan with Drive. File with Filently.
For anyone doing this regularly with client documents or transaction files, a consistent file naming convention makes a significant difference in how findable those scans are six months later.
Why this matters more than it sounds
The scanning step is small. But it happens dozens of times a month for freelancers and anyone running a business with physical paperwork: signed contracts, receipts, invoices, IDs, inspection reports. Every one of those is a file that needs a name and a home. If you handle ten scans a week and spend ninety seconds on each one (scan, rename, file), that’s over an hour a month on a task that should take seconds.
Automating the intake doesn’t just save time on each individual file. It removes the mental overhead of deciding where something goes every time a new document arrives. If your Drive is already messy from years of inconsistently named scans, our guide on why files get lost in Google Drive covers how to fix the root problem.
Frequently Asked Questions
Does the Google Drive scanner work on both iPhone and Android?
Yes. The built-in document scanner is available in the Google Drive app on both iOS and Android. Open the app, tap the “+” button, and select “Scan document.”
What format does Google Drive save scanned documents as?
Google Drive saves scanned documents as PDF files by default. The scan quality is generally good enough for most business documents: contracts, invoices, receipts, and forms.
How do I scan multiple pages into one PDF in Google Drive?
After scanning the first page, just hold the next document in front of your camera. Google Drive detects it automatically and scans it without any extra tapping. All pages are combined into a single PDF file.
Can I scan directly to a specific folder in Google Drive?
Yes. In the upload step after scanning, you can choose any folder in your Drive as the save location. If you use Filently, choose your Filently Inbox folder and Filently will handle the naming and routing from there.
Do I need a Google One subscription to use the scanner?
No. The document scanner in the Google Drive app is available on the free plan. You do not need a Google One or Google Workspace subscription to use it.
How do I upload an existing scanned document to Google Drive?
If you already have a scanned file on your phone or computer, open Google Drive, tap or click the "+" button, and select Upload (not Scan). On desktop, you can also drag the file directly into the Drive window. The file lands in whatever folder you currently have open.
Can I scan from a printer directly to Google Drive?
Not through the Google Drive app directly — the built-in scanner uses your phone’s camera, not a connected printer. For printer scans, you have two options: save the scan to your computer first using your printer’s software, then upload it to Drive via drag and drop. Or, if you use Filently, scan directly to your Filently email address — the document lands in your Google Drive automatically, already named and filed.
I was 30 when I figured this out. You don’t have to wait that long.
Scan with Drive. File with Filently. Every scan gets a real name and the right folder — automatically. No renaming. No dragging.
First 25 documents free. 2-minute setup. No credit card needed.